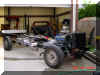
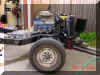
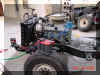

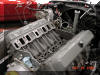
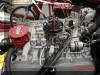
I finally have bought and installed all the little odds and
ends.
I have wired it up and tightened up all the clamps and bolts.
Fluids are all full and ready to go. Contact! push the start button
and
it roars to life. I had a couple of little problems with not cooling
and a carb problem from it sitting and collecting dust. Now that the
problems have been sorted out it fires up and idles at 675 RPM.
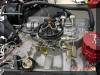
I have installed the Holley Projection since starting the engine
and now have to tune it and work out the bugs.
Here are some videos if you want to hear the 455 start and run.
video1 video2
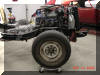
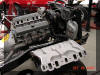
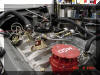
I decided to upgrade the distributor in preparation to allow
the Holley EFI computer control the ignition timing. I had
a problem with the oil pump drive rod staying in the distributor
which caused a inconvenience due to the drive rod clip deciding
slip off the drive rod and fall into the oil pan. I was able to fish it
out the drain plug hole without having to remove the oil pan.
I did have to remove the intake and reinstall it with new gaskets
because of a oil leak and possible internal vacuum leak.
I next found that the intake needed to have a notch cut so
the new distributor would sit all the down in the block.
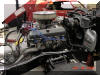
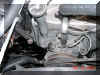
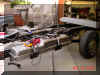
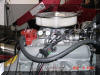
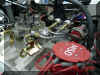
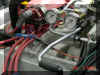
I ordered some fuel pressure gauges and had to figure out
how to get the fuel under pressure to them and here is what
I did. I still need to make a bracket to keep them from moving.
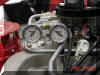
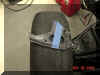
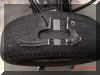
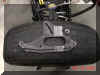
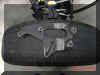
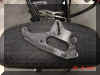
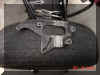
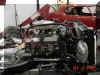
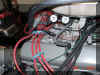
Here is a few pictures of the new bracket I made to hold
the gauges, fuel lines and ignition coil. I still need to drill
a few holes and secure the coil & gauges.
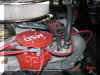
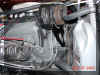
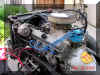
I needed to customize the A/C to water pump bracket
because I am using the accessory brackets from a mid 80's
307 so I can keep the R4 air compressor that came on my truck.
I cut the bracket and tacked in some flat stock and then tested the fit.
Then I welded all the joints and ground them smooth and painted
them so they will not rust immediately. I had to do this because GM
did not use the R4 compressor on the 70's 455's and I did not want
to use the A6 compressor the would have been used on those years cars.
I need to do some more grinding and welding some of the low spots.